Learning Finnish with GenAI: Part 2 - What the hell is an agent?
- Savidu Dias

- Mar 1
- 24 min read
Updated: May 11
Welcome back. I know what you’re thinking… “Waaat? You actually did a part 2 for a blog “series” of yours?” Yes I did. It’s a moment of celebration for all of us. Treat yourself with something nice. I heard gambling is nice.
Part 2?? I didn’t even read the first part. You’re not that interesting.
Alright… bit rude, but let’s recap, shall we? The goal of what we are trying to do is get a web application that teaches you Finnish through conversation. This is the end result.
What we have so far is a “Gem” on “Gemini”. This is what it looks like.

So it’s a customized version of a Gemini model that helps me learn Finnish through conversation. I get set up with a scenario, and have to work my way through conversation. During the conversation, the AI model will address any mistakes I make and tell my what I did wrong, continue the scene, and nudge me in the right direction with some words I could use.
What's next?
This is nice and all, but it has a few limitations.
The conversations are too short (you can only go so far in a conversation at the post office). Afterwards, the conversation becomes boring and meaningless.
You go through the same 4-5 scenarios all the time.
Boring and horrible to use.
So you’re going to fix these limitations right?
Absolutely not. What we are going to do here is create a system that has the ✨ potential ✨ to address these limitations.
The biggest problem we have here is the prompt itself. It’s 662 words (4330 characters) long. Although this is not much for an AI model, especially for Gemini, it’s a big ask. Sure it delivers what we asked it to, but it has its shortcomings.
Think about it. This single model has the responsibility to
Greet the user
Setup the scenario
Translate unfamiliar words/phrases
Ask the user questions
Give word tips
Analyse the user’s response and give feedback
Continue the conversation
Keep the same style format across all conversations
Phew. That’s a lot of things for a single program to do. Ideally, if we want to do better, these tasks should be handled by their own sets of models. This way, each model can use its full potential on smaller tasks. At least that’s the plan. Doing that involves a lot of planning, and to be honest, a lot of knowledge.
I’m still new to this world of AI remember? Well, we all are. But the point of this exercise is for me to familiarize myself with this new world we are in. If I’m going to make this complex web of AI models talking with each other to try teach Finnish, I need to start small. I need to make the most basic version of an AI agent and figure out how to go from there.
What the hell is an AI Agent?
An AI agent is an autonomous software system that uses artificial intelligence—typically large language models (LLMs)—to perceive its environment, reason, plan, and take actions to achieve specific goals without continuous human oversight.
Holy moly that is so boring. I promise to never cite from the internet again. Let me try to explain it in terms you will understand.
Imagine you gave birth to a child. Some way along the line, you hear him say “six seveeen” and realise that there’s no future for him. He has consumed brainrot beyond repair. Maybe there is a way to fix this. Maybe if you can get him to stop watching those darn TikToks. All you need to do is waterboard him stop him from watching TikTok.
So you do what any normal parent would do. You secretly hide a microphone in his room. The microphone hears the words coming out of the room and sends them to an AI model that we’ll call “GhatCPT”. GhatCPT decides if these words are brainrot or not. If it is, it sends you a text message “your dumbass spawn is watching Mr. Beast again. Do you want me to execute him tell him to stop?”. You say “nah, just lock his phone”. GhatCPT then calls some Android parental control API that makes the child’s phone explode (or something like that. I don’t know I don’t have kids).
Basically that’s how AI agents work. It’s like an app you can talk to or text with, and it will do the things for you behind the scenes. So that’s what we are going to do. We are going to try build an AI agent.
Where do we start?
Building an entire agentic system is a lot of work. Like any software project, it’s important to start small and work our way up from there instead of rushing into things. What we are going to do today is very simple, we want to do 2 things:
Communicate with an AI model
Show the messages from the model nicely in an app.
Alright, so our goal is to have some sort of application (like a messaging app) to talk to our AI agent. For the application to be able to communicate with the agent, there should be some structured way for it to talk to. So the first thing we should have is some sort of client-server architecture that enables a front-end application to communicate with the agent.

Simple enough. But how do we get the output from our agent into the application? Remember what out output looks like? The messages we get from Gemini is unstructured. That is, it’s basically just a bunch of text, bullet points, paragraphs, and whatnot. There’s no way for us to take this message and break it down into a nice structured format so that our application can understand it. Or is there? This is where agents come in.
What we will do is very simple. We have our usual Gemini model that sets the scenario, ask us questions, give feedback and word hints in a certain way. Then we will have another model that takes a look at this and turns it into a nice JSON format that can be understood by a web application. That’s it. That’s our agentic system.

So we have our usual AI model who we will now call “Teacher”. The teacher will look at your message and give feedback. But now, the feed back doesn’t go to you, no no no. It goes to another model who we call the “Extractor”. His job is to look at this message in natural language and convert it into a JSON structure and give it back as a response to the server.
For the Extractor to do this, we need to let it know what to expect. It needs to know what the message from the Teacher looks like, and then it needs to know what to do with it. So we tell him that the message will have some feedback, conversation, and word tips. This is given to the Extractor as a prompt like this.
You are a specialized text parser for Finnish language learning feedback. Your task is to extract structured information from teacher feedback messages.

The feedback follows this structure:
1. **Feedback/Reinforcement** (optional): Brief positive reinforcement OR error correction
2. **Conversation Continuation**: The next turn in the conversation (Finnish text with English translations)
3. **Word Tips**: Vocabulary suggestions for the next response
Then, we need to let him know what information we need to take from this message. This part is a little tricky. I had to do a lot of trial and error before finding a solution that works. Eventually, this is the prompt that I ended up with.
Extract the following information and return it as a JSON object.

1. **message_type**: The type of feedback message
   - "initiation" if this is the first message (contains greeting and scenario setup)
   - "feedback" if this is a response to user input (contains error correction or reinforcement)
   - "conclusion" if this is the end of a conversation (contains farewell, summary, or completion message)

2. **has_error**: Whether the student made an error (only relevant for "feedback" type)
    - "YES" if there is a clear grammatical error
    - "MINOR" if there is a minor mistake, stylistic issue, or unnatural language
    - "NO" if the user has not made any mistakes

3. **feedback_text**: (only if has_error is "YES" or "MINOR")
   - The brief positive reinforcement OR the introductory feedback text (e.g., "I've noticed a small error...")
   - Use null if this is an initiation message

4. **error_details**: (only if has_error is "YES" or "MINOR")
   - **user_mistake**: The exact incorrect phrase/sentence the student wrote, including any English translations in parentheses
   - **corrections**: Array of one or more corrected versions, including any English translations in parenthesesMi
   - **explanation**: The explanation of why it was incorrect and how Finnish grammar works in this case

5. **greeting**: (only if message_type is "initiation")
   - The Finnish greeting response
   - Use null if this is a feedback or conclusion message

6. **scenario**: (only if message_type is "initiation")
   - The scenario description in Finnish with English translations
   - Use null if this is a feedback or conclusion message

7. **conversation_continuation**: The main conversational content
   - For initiation: The initial prompt/question
   - For feedback: The continuation of the conversation with the next scene/question
   - Include the full Finnish text with inline English translations

8. **word_tips**: Array of vocabulary words provided
   - Each item should have: {"finnish": "word", "english": "translation"}
Now that our Extractor has captured the important information from the message, we need to let it know what to do with this information. What we want it to do is return this information in a JSON format. Again, this took a lot of trial and error, but eventually I learned that what works best is for you to give the JSON schema and tell the extractor to return the output following this schema.
**Expected JSON Schema for the structured output:**
```
{
    "type": "object",
    "properties": {
        "message_type": {
            "type": "string",
            "enum": ["initiation", "feedback", "conclusion"],
            "description": "Type of message"
        },
        "has_error": {
            "type": "string",
            "enum": ["YES", "NO", "MINOR"],
            "description": "Whether the student made an error"
        },
        "feedback_text": {
            "type": ["string", "null"],
            "description": "Brief positive reinforcement or error introduction"
        },
        "error_details": {
            "type": "object",
            "properties": {
                "user_mistake": {
                    "type": ["string", "null"],
                    "description": "The incorrect phrase/sentence"
                },
                "corrections": {
                    "type": "array",
                    "items": {"type": "string"},
                    "description": "Array of corrected versions"
                },
                "explanation": {
                    "type": ["string", "null"],
                    "description": "Explanation of the error"
                }
            },
            "required": ["user_mistake", "corrections", "explanation"]
        },
        "greeting": {
            "type": ["string", "null"],
            "description": "Finnish greeting (initiation only)"
        },
        "scenario": {
            "type": ["string", "null"],
            "description": "Setting up of the scenario for the conversation (initiation only)"
        },
        "conversation_continuation": {
            "type": "string",
            "description": "The main conversational response"
        },
        "word_tips": {
            "type": "array",
            "items": {
                "type": "object",
                "properties": {
                    "finnish": {"type": "string"},
                    "english": {"type": "string"}
                },
                "required": ["finnish", "english"]
            },
            "description": "Vocabulary words provided"
        }
    },
    "required": ["message_type", "has_error", "feedback_text", "error_details", "greeting", "scenario", "conversation_continuation", "word_tips"],
    "additionalProperties": False
}
```
I had to play around with this prompt a lot. I noticed many issues while I was doing this and had to fine-tune It many times. What I found that helps is to give it some additional guidelines like "Extract the content accurately without adding or modifying information”. You can read the full prompt here.
You talk a big game. But how did you actually do this?
You’re absolutely right! It should work, but how do you get a Gemini model to pass its output to another model to convert into a JSON format. The most common way of doing this is through an AI Orchestration Framework. Now that’s a big name. But don’t be scared. It’s just some Python library that lets you talk to AI models, get their outputs, feed them to other models, and take over the world. They can do a lot more, but we don’t need to think about those for now.
AI is a field that is changing very quickly. There are many AI Orchestration Frameworks. The most famous one as of writing this is LangChain/LangGraph. There are also other frameworks like Strands Agents by AWS, Microsoft AutoGen, CrewAI.
How did you pick a framework?
Honestly? I chose what was easiest to me at the time. I knew that I wanted to run this on AWS. AWS has a service called Amazon Bedrock AgentCore (it’s a mouthful, I know) that lets you build and deploy agents. One of the cool things about this is that it lets you create agents using any framework. However, most of their documentation at the time showed you how to create agents using Strands Agents, which is Amazon’s own framework. So that’s what I decided to use. But it has been around 6 months since I developed this, and I have used LangGraph and started really liking it. So I might switch when I eventually re-write everything into something much more complex. But for now, you’re stuck with Strands Agents. But I won’t bore you with too much code.
As a matter of fact, the code is so simple that even a baby could do it. This is all there is
It’s so simple right? Well, there’s a little more to it, but you get the gist of it. You can take a look at the whole code here.
But do you see what I mean by ✨ potential ✨? Right now it’s Gemini agent talking to another AI. But think about it. One day you can have an AI talking to an AI that is talking to another AI that is talking to another AI that is talking to an entire army of AI robots who will help me take over the world. Pretty neat right? But we’re not going to do that in this blog or the next one. Maybe the one after that. If I ever manage to get to it.
You talk too much… What does this actually look like?
Since we are deploying this on AWS Bedrock AgentCore (that’s a really long name, I’m going to call it AgentCore from now on), Amazon has given us a CLI tool that is really easy to use. Once you have created your agents, you just need to run 2 commands to get them deployed and running on AWS. There’s a lot more to it, but if you’re interested, you can take a look at the documentation on AWS.
Psst… this part is very technical. Feel free to skip this if you’re feeling sleepy.
First you run the command agentcore configure, which takes the the Python file for the agents you want to run as input. Within the Python file, it looks for the function that has the @app.entrypoint annotation, which is what it will invoke with the message that you send to it. What the configure command does is it creates a Dockerfile that converts your agent project into a container image. It will also create a file called .bedrock_agentcore.yaml which has information about all the IAM roles, and other AWS resources that gets created behind the scenes that lets us to deploy the application.
Remember how I said that you can use any framework with AgentCore? Now do you see how that is possible? All AgentCore is is a glorified wrapper that runs literally any Python code. You could in theory write an “agent” like this.
Once you have configured the agent code, you can simply deploy it to AWS with the command agentcore deploy. This takes a few minutes creating all the roles, images, containers and whatever else that goes on under the hood. But once it’s ready, it creates this thing called a “runtime” on AgentCore. This is what it looks like on the AWS console.

After it’s deployed, you can message the agent in a few ways. You could simply do it in the your own command line with agentcore invoke '{"prompt": "Hei"}'. My choice of messaging with the agent is doing it programmatically. You could use the AWS SDK for whatever language your messaging application is running on to call the agent. For example, in Python it looks like this.
That is basically how we are going to do it in our server.
Actually, before talking about the server, I never told you about the model we used for the Extractor did I? To be honest, this is something I didn’t give much thought to. I tried doing this with different models from Anthropic and OpenAI. I ended up going with GPT-4o because I liked it slightly more. But any LLM would work fine either way.
Note from future me: Going with GPT-4o was probably not a good idea. While it works well, it’s quite expensive. It costs around €0.10 per conversation. It’s not a lot for one person but it won’t scale if I ever want to do this for a larger audience. It’s not really all that surprising if you think about it. It has to take the conversation and basically re-structure it into JSON. Each interaction has thousands of tokens. So it’s thousands of tokens as input and thousads as output. So it racks up a lot of money very quickly. I switched over to GPT-4o-mini some time later. It’s slower, but gets the job done for almost free. No, really. I’ve been using it for months, and my total spending is €0.06 so far.
There are probably some cheaper and faster options out there. I’m just too lazy to actually do the research. If you are aware of any better solutions, please let me know.
Blah blah blah. Do you talk about anything other than agents?
Geez alright. Let’s talk about the server then. This is the easiest part of the whole system. All you need to do is take the message from the user and pass it on to the model. I already showed you how we can do this with the AWS SDK.
The server is written using FastAPI for Python. There’s nothing special to say about the server. If you have seen backend applications written using FastAPI before, this would be very familiar. How it works is I defined an API endpoint called api/v1/chat/message. This is where our application would send the message to. You can take a look at the definition of the endpoint here.
If you go through the code for the request endpoint, you will see that it it invokes the agent using the AWS Python SDK (Boto3) with the message from the application here.
This invokes our agent that we just deployed and stores its response. Since we modified our agent to respond in a JSON structure, we can easily assign this to an object like this that we can easily use.
Pretty standard stuff if you are familiar with FastAPI. Anyway, now for the fun part. We can test out our API by starting the server locally and sending a request to this endpoint.

Perfecto! The server managed to communicate with my agents (now in AWS) and deliver the response back to me in JSON. Notice a few things here. The purpose of having a session ID is for the agent to be able to remember me the next time I send a message. It uses this ID to keep track of the conversation. This way, if I want to start over, I can simply send a message with a new session ID. But let’s try responding to the message with the same ID.

I responded with saying that I want to order small coffee and carrot cake. The agents can now continue the conversation because it knows to continue the conversation from the same session.
Let’s try making a mistake just to see what the response looks like.

As you can see, the style of content of the responses is exactly the same as what we had in the previous blog, except now it’s nicely structured into a JSON format. Also something interesting to note here is the response times. Responses usually take around 6 seconds, but the response time for error messages is a bit longer (around 9 seconds). This is because the extractor (GPT) model needs to take a bit of time understanding and restructuring error responses.
Fun fact: when I’m practicing with this, I would know that I messed up when the response starts to feel longer than usual.
Now that we have the server ready, it’s time to make the front-end.
How does a Data Engineer write Front-end code?
Well, this is where things get interesting. I don’t. The whole point of why I am doing this is to learn new things. Web or mobile application development is not one of those things. Why? Because I’m bad at it. But you might say some crap like “The light of mastery is only found by venturing into the shadows of your own incompetence.”… wow so profound. How about you shut up instead?
While vibe coding is a thing now, I don’t know if any respectable developer actually writes code that is entirely written by AI. Lucky for you, I’m not a respectable developer. So I decided that I would create the whole frontend entirely with the help of AI. But If I’m going to stoop as low as to vibe code an entire component of this project, I’m going to do it the right way.
I could of course start with a blank canvas and tell GitHub Copilot something like “Make me a chat interface where I can learn Finnish. But no bugs, ok?”. But I’ve come this far and learned so much about AI models and how they “think”. I did a bit of research on ways I could develop a web application almost entirely with AI. Then I came across the most majestic word I have ever seen; “Spec-Drive-Development” (it’s technically one word because it’s hyphenated).
Specification-Driven Development (SDD) is the practice of creating the blueprint of the software you are going to implement before diving straight into code. A good analogy that I heard is that if the code is a house, the specification is the blueprint. It doesn’t talk about the bricks and the nails, but it tells the builder exactly what to. The builder decides where the bricks and nails would go. Similarly, a specification is a very high level description of a feature that you would write before handing it off to developers to implement it.
So how it works in this project is that I come up with this specification, and then give it to an AI model to write the code for me. Sounds good? At the time of writing this, there are two big players in the world of SDD. Amazon Kiro and GitHub Spec-kit. Given that this project is heavily based on Amazon services and I have many times in the past said that I want to expand my skills on AWS tools, it’s obvious who I should go with right? That’s right! I decided to go with Spec-kit!
The real reason I chose Spec-kit over Kiro was the fact that it was more flexible in terms of the tools that were available to it. You could use it with almost any AI Dev tool like Github Copilot, Cursor, or Claude Code, whereas Kiro was limited to its own tool. Also, Kiro was in a preview stage when I started doing this, and I was stuck in a waiting list for too long to get early access to it. Soooo… that’s what you get Amazon! The Early bird gets the worm.

It’s simple as it sounds. You write the specification, and your coding agent looks at it and writes the code for you. Except that’s not what happens. This is what happens.

sigh…. alright let’s do this. This right here is the flow of Spec-kit. The flow chart is a direct screen grab from the website of the author of spec-kit. Writing specifications is not as simple as one might think (and rightfully so). The first thing you need to do is install spec-kit and set it up on your project. Depending on the AI dev tool you are using, the next part will be different. I used GitHub copilot because it’s very cool. But when you set up Spec-kit on GitHub Copilot, all it does it it creates some prompt files and scripts.
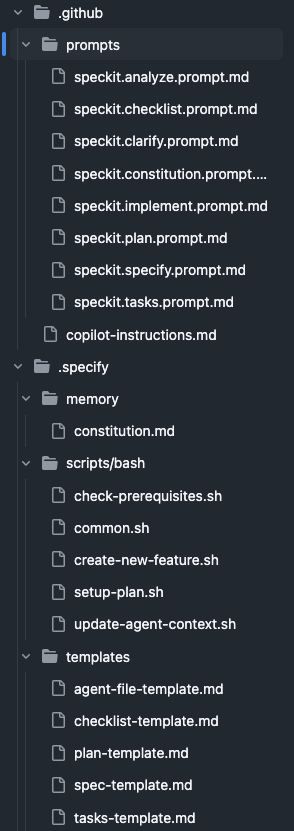
These are all of the instructions that the AI agent needs to write code based on the specifications that you give it. You would notice that the names of the files in the prompts folder is awfully similar to the green and yellow rectangles in the flowchart. That is a mere coincidence that has nothing to do with this. Kidding. That is because those files are the instructions that are given to the AI agent when you run those commands. So let’s start with the commands then. After you have set up Spec-kit on your project, when you type /spec on your Copilot chat, you will see some suggestions like this.

These are the commands that you will need to write your specification and generate the code. So for example, when you do the command /speckit.constitution, it will run the instructions in the speckit.constitution.prompt.md file. I had no plans of explaining the spec-kit process when I started writing this blog, but now I feel like doing it because I think it’s really interesting. But if you’re not interested…. too bad keep reading.
Constitution
Constitution is what they call “a set of non-negotiable principles” for the project. This is where you lay out the groundwork. You need to let the AI know what your project is and what it isn’t. You can also define some technical guidelines like “follow every feature implementation with writing and testing with unit tests”. So this is a command that you should ideally run once for the project and never have to think about again. For example, I ran the command like this:

One of the cool things here that on the bottom is that you can chose which model to run this with. I found that generating text and specifications work really well with GPT models. But you can chose to use for example something like Anthropic if your constitution is very tech-heavy. Or you could run this a few times with many models and see what works best for you.
After running the constitution, your coding agent does a lot of things behind the scenes by following the instructions that you have given, as well as what is there in the speckit.constitution.prompt.md file. This may take some time, but it’s important that your constitution is clear and concise as possible. After everything is done, it will create a constitution document in .specify/memory/constitution.md.
This doesn’t need to be said, but you shouldn’t take this document at face value. You should go through it yourself and make adjustments based on your ideas. After all, you are supposed to know more than the AI. You could manually change the file, or talk with the AI and make adjustments.
Specify
What comes after the constitution. Don’t believe me? Scroll up and see for yourself. I’ll wait.

Haha made you scroll! I pasted a crop of the flowchart here. You just wasted your time. You fool! Oh the look on your face.
Anyway, now we can get to some good stuff. It’s time to get into the specification. I feel like this term is a bit misleading for what it does. As an engineer, the word “specification” carries some technical weight alongside it. But the focus here is that you should talk about the functional requirements. There’s a separate command where you should talk about the technical details. We’ll get to it later.
The constitution is something you generate once for your project and never give much thought about it ever again. However, specify is a command you should run for each new “feature” that you do. This is where things get tricky. Although I said “feature”, I personally would start with something small and iterate on top of it if I had to do this again. Also, it’s important that the information that you give here is as detailed as possible. But don’t worry too much about it, because you can refine things later. But I found it useful to be as descriptive as possible.
As an example, this is the first spec message that I came up with. The idea here was that I would be starting with a simple UI that has a chat interface where you can send message the teacher.
Specify message:
Initial page setup - this application should be a conversation style language learning web app called “Sanora”. This interface should be clean, vertically scrolling chat window that resembles modern messaging applications.
Messages sent by the user are displayed in distinct chat bubbles aligned on the left side, visually differentiated by colour and background.
Feedback messages sent by the teacher (comes from the backend) has a distinct style. The feedback is separated into components horizontally, each separated by something similar to a <hr> HTML tag.
Feedback messages consist of 4 components. Each component is represented by a rounded square having different border colours. The size of each component varies depending on the content inside of it. Keep the components of the feedback message empty as a placeholder to be populated in a future specification.
At the bottom is a single message input bar where the user types their prompts or questions.
It often includes:
A text box with placeholder text (e.g., “Send a message…”).
Send button (usually an arrow icon).
The application interface should follow a light and modern design, while giving predominance to the colours white and blue.
Now this is very detailed. I had a lot of trouble getting this to a level that I wanted in the final implementation. If I had to do this again, I would maybe split this into 2 specifications. The first being a simple chat interface, and the second spec to customize how the teacher’s message looks.
Also if you scroll all the way to the top and look at the video of the final result (don’t worry, I won’t post the video again. I promise), you can see that the feedback component is not actually horizontal. It’s vertically scrollable instead. This is an example where I changed my mind about the design along the way. So you don’t need to worry too much about what you say in specification. You can always change your mind.
One important thing to note here is that you should run each spec (and the commands that follow) in a new chat session. It helps the AI model differentiate what you have been doing with what you want to do next.
Anyway, once the agents do their thing, you will can notice that there is a new folder called specs/000-<spec-name> in your project. This is where all the relevant files for that specification would go. There will be only one file at the time called spec.md. If you are familiar with the software development principles, you will see some friendly words like “user stories”, “functional requirements” and whatnot here. You should obviously go through this and see if this generated specification aligns with what you have in mind. If not, change it or ask the AI to do it.
What's next?

Clarify (optional)
This is an optional command, but I recommend using it because this gives your specification looked at a second pair of eyes. Being the owner of the specification, it’s very possible that you have missed requirements you didn’t know, or haven’t specified something because it seemed obvious to you. Basically, you can use this command to have your coding agent go through the specification and clarify any ambiguities with you.
Plan
Now comes the fun part. The technical details. This will tell the agents to create all of the files, artifacts, and whatever else that is needed to write the code (we don’t start writing code yet). But this is the part where you give all the technical information you need to the agent. Things like programming languages, libraries and whatever else.
Being someone who doesn’t have any frontend development experience, I somehow decided that I should use React and typescript. The model has free reign on everything else. Also something really cool I did was I gave it the Openapi spec for the server endpoint, so that it has a better idea on what to request, and what to expect as the response. This was a game changer. One of the cool things about developing with FastAPI is that you can automatically generate this specification based on how you have defined your dataclasses.
What the plan command does is surprise surprise; create another markdown file. This time, it’s called plan.md. But wait! There’s more! It also creates a file called data-model.md that highlights the contracts such as the schema that we gave to it. Then what?

Checklist (optional)
Now this one I haven’t used myself in this project, but the idea here is that you can use this as how the developers of spec-kit call it “unit tests for English”. It goes through the spec just to ensure that it covers what is needed for a specific domain (e.g. UX, security, accessibility, etc.)
Tasks
Alright. Take a deep breath. By this time, we have generated so many different documents. The tasks command goes through all of these once again and comes up with a set of tasks for the agents to do when it starts the implementation. Can you guess what the output of this is? That’s right, another markdown file. This time, it’s called tasks.md.
I believe that this is the most important command in the whole process, as coding agents often tend to go overboard when it tries to write code for you. At least in my experience, but maybe this is a skill issue. But the idea here is that you have a clear list of defined tasks, and there wouldn’t be any unexpected surprises when the agent is done writing the code.
If you take a look at the tasks file, you can see that it is indeed very detailed. It has a clear breakdown of the tasks, categorised by user story.
I know that I have said this many times, and it’s not needed to be said, but please for the love of God go through all of these files yourself before moving over to the next step. Speaking of, what is the next step?

Analyze (optional)
This is the worst command of them all. Because it’s spelled with a “z” instead of “analyse”. Why did Americans have to go and ruin the English language?
Anyway, this is an optional command that acts as a final safety check before we dive in to the implementation. It goes through the spec, plan, and tasks and makes sure that everything flows properly the way it should.
Implement
We are finally at the end. Keep in mind that we have run many commands at the moment. The chat session with your coding agent is filled with a lot of information that is probably not relevant and is documented anyway. In my experience, it helps a lot when the coding agent is starting fresh and doesn’t have a lot of noise from earlier contexts. It can also help you save a lot of money on token costs. Also this would be a good time to switch over to a model that does well in coding tasks.
This is the part where you take a deep breath and run the command. It takes a really long time to run this command, but it’s good to monitor what it’s doing. Since this was developing a React application, it downloaded a lot of npm dependencies, which was really scary considering the news of all the npm worms AI and vibe coding has introduced. I would recommend you run this either in a Virtual Machine or a computer that doesn’t have anything important in it, just to be on the safe side.
Did it work?
Ladies and gentlemen, I am pleased to announce that it did in fact not work. Well, not on the first try. But to be honest, I was not expecting it to. So was it a waste of time? Of course not. When I said that it didn’t work, what I meant was that it did like 90% of the things that was specified. The other 10% was either hind of half-baked or maybe misunderstood by the LLM.
But lucky for me, fixing these issues was not too difficult. It took a few hours, but it would have taken me days to do it on my own. But you can still keep talking with the agent, tell it the problems you are facing, and let it try to fix them for you. it’s frustrating, but it eventually gets the job done.
What are your thoughts on spec-kit?
I regret not taking any screenshots of my working progress at the time because that would have been really interesting to show. But a TL;DR version of the final result was that the UI was not at all what I wanted. The app was functional, but it didn’t look like what I had in mind. Which is why I recommended earlier that you start small, and work up in small steps.
Eventually, I managed to adjust the chat interface to my liking by defining a second specification just for that. I won’t bore you with the details, but you can take a look at the specification files for that here.
So now you have everything right?
Let’s take another look at our planned architecture, shall we?
Yup, we have our messaging application that talks to the server though a REST API. The server invokes our agent, which is two models. The message from the server goes to the teacher model, who produces some feedback and gives it to the extractor, who looks at it and converts the feedback into a JSON structure. This JSON message is given back to the server, who returns it to the messaging application that shows everything in a nice UI.
There is a small problem though. The agent is running on AWS, the server and front-end is on my computer. I can use the front-end application on my phone’s browser as long as I am in the same network as the computer. But this is hardly ideal since I can only use this when I’m at home. That would mean I won’t have time to watch TikToks when I’m at home. This is a big deal. I need to be able to use this whenever I want.
So the obvious solution is to host all of this somewhere, and that is what we are going to do in the next blog. If I ever make one that is…
Comments